How to convert FLAC to MP3, WAV, M4A, AIFF, WMA on Mac
- A through guide about mediAvatar FLAC Converter for Mac
mediAvatar FLAC Converter for Mac helps Mac users convert FLAC to other popular audios formats. And in this guide we will introduce how to convert FLAC to MP3, WAV, M4A, etc audios. Meanwhile, this Mac FLAC Converter also involves some useful features like clip FLAC segment to convert, add special audio effect and so on, which we will introduce in the article also.
Download, install and launch mediAvatar FLAC Converter for Mac. And after registered, you will see the first screen like this:
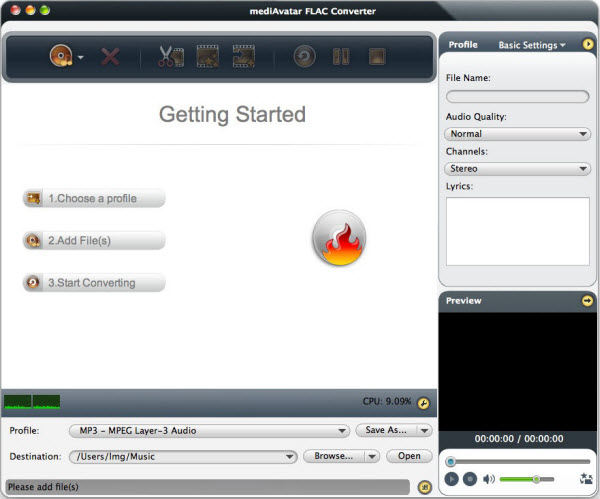
And let's start the guide from here.
Step 1: Load the FLAC files you want to convert
Drag and drop FLAC file(s) you want to convert into the software, or click on "Add File(s)" button on the toolbar to browse and load the file(s). You can add multiple FLAC files at the same time.
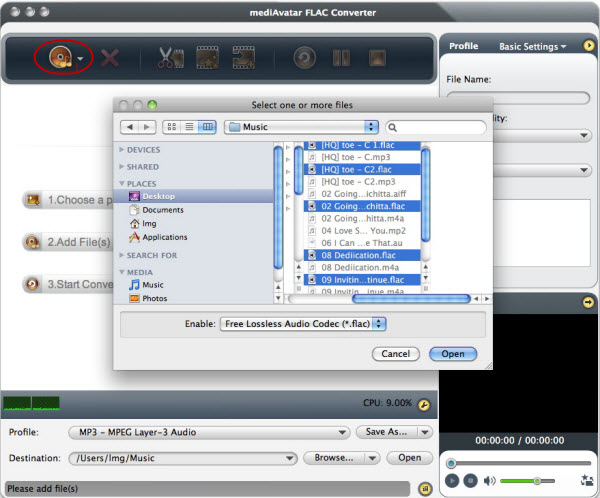
Step 2: Set the Output Format and Destination Folder
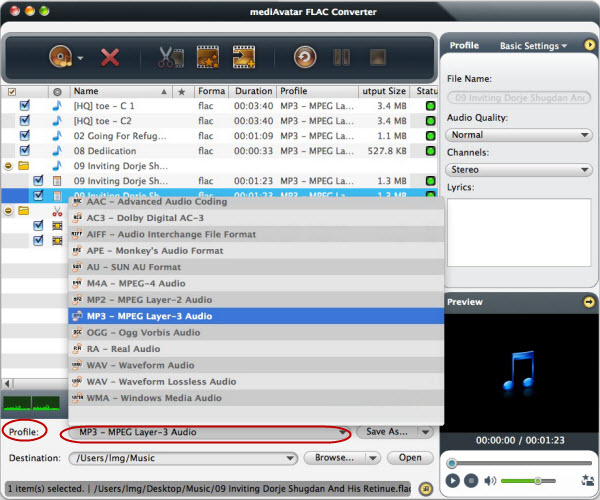
Choose the "file(s)", click and open "Profile" drop-down list, then choose the output format. As you see from the image below, mediAvatar FLAC Converter for Mac now supports converting FLAC to MP3, WAV, AAC, M4A, AIFF, WMA, OGG, AC3, APE, RA, AU, MP2 and WMA lossless audios. Choose the format you want. And you can set different formats for each file.
Meanwhile, if you would like to convert one FLAC file to more than one formats, like you want to convert the file to both MP3 and WMA, you can click "add profile" button on the toolbar, and choose the second profile simply.
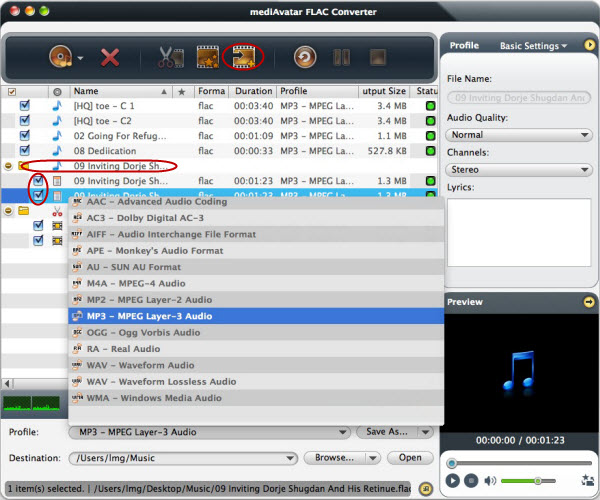
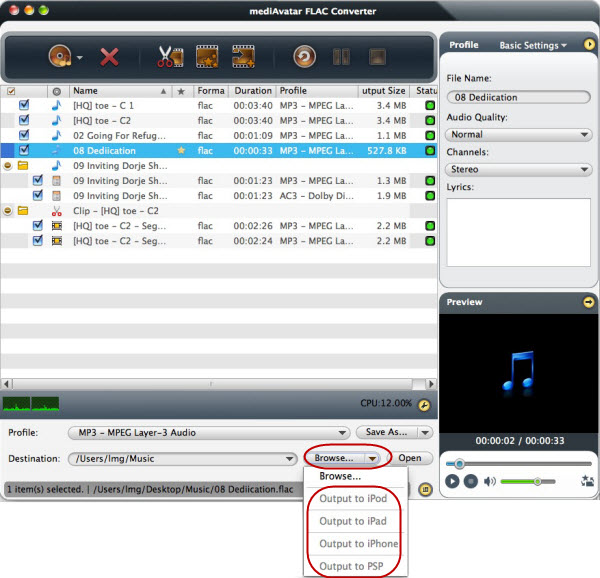
Then click "Browse" button beside to choose an output folder as the destination for saving the outputted audio files. Besides saving the output files to your Mac, mediAvatar FLAC Converter also allows you to save and transfer the file to iPod, iPad, iPhone or PSP when the device(s) is(are) connected with Mac.
Step 3: Customize and optimize the output audio (optional)
Clip FLAC segment to output
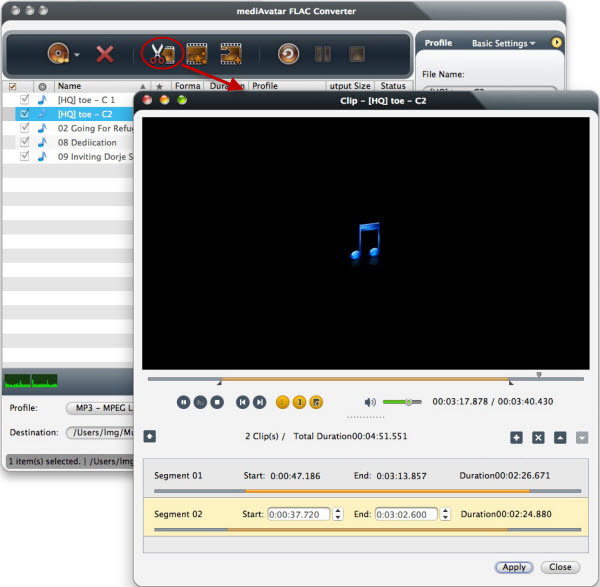
This is useful when you pick out a segment from a song or you make a ringtone from songs. Choose the source file, and click the "clip" button to open the clip window. Click "Set Start Point" and "Set End Point" icons during playback to set the start and end points of the segment. Repeat this step to add as many segments as you want.
Adjust sound effects for output audio
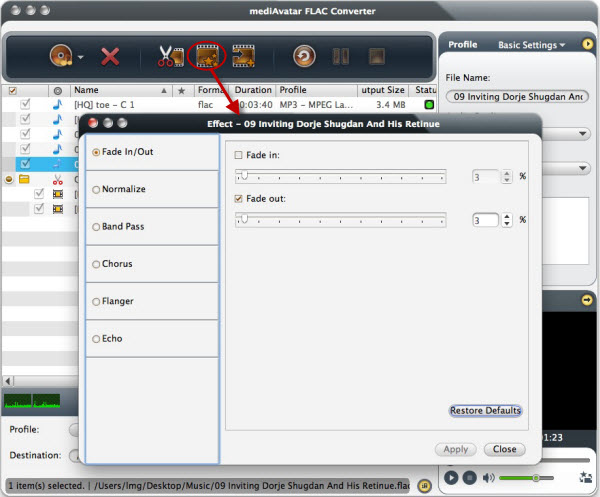
Choose the file you want to adjust effects from the file list, and click "Effects" button at the toolbar to open "Effects" window. Here you can set the "Fade In/Out", "Normalize", "Band Pass", "Chorus", "Flanger" and "Echo" sound effects for the output audios.
Optimize the audio parameters
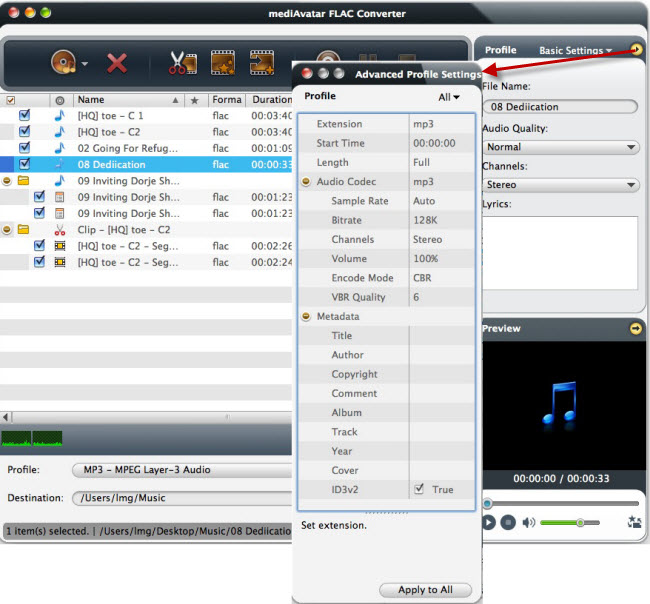
This Mac FLAC audio converter provides ready to use formats for naive users, at the same time advanced user has the option to adjust the parameters in the basic/advanced settings panel.
Step 3: Start the FLAC to audio conversion
After all settings above just click "Convert Checked Item(s)" button on the toolbar to start the conversion.
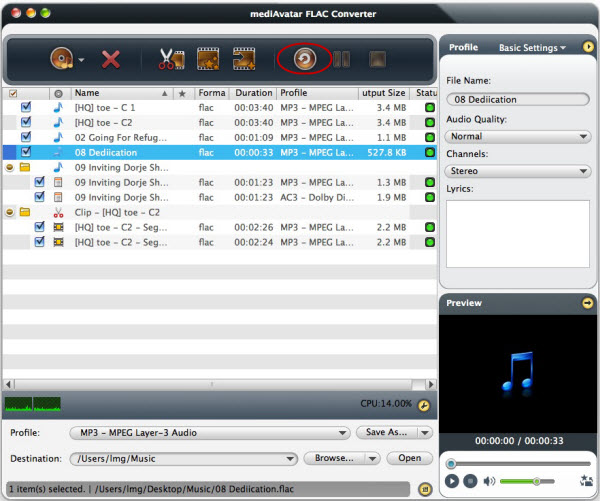
And here for your notice, this is the registered version, and the evaluation copy can only use part of the functions, to try more, you can purchase the license which will be sent immediately.


