How to convert FLAC to MP3, WAV, M4A, AIFF, WMA, OGG, APE, RA audios
- A through guide about mediAvatar FLAC Converter
mediAvatar FLAC Converter makes it easy to convert FLAC lossless audios to other popular audio formats. You can convert FLAC to WAV lossless, WMA lossless, AAC, AC3, AIFF, APE, AU, , M4A, MP2, MP3, OGG, RA, WAV, and WMA for playing on more media players. And you can directly transfer the output music to those players after the FLAC conversion. What's more, it's possible to pick a segment from the source FLAC files to convert and edit the music effects like fade-in, fade-out, and volume normalize using mediAvatar FLAC Converter
Download, install and launch mediAvatar FLAC Converter. And here is the first screen:
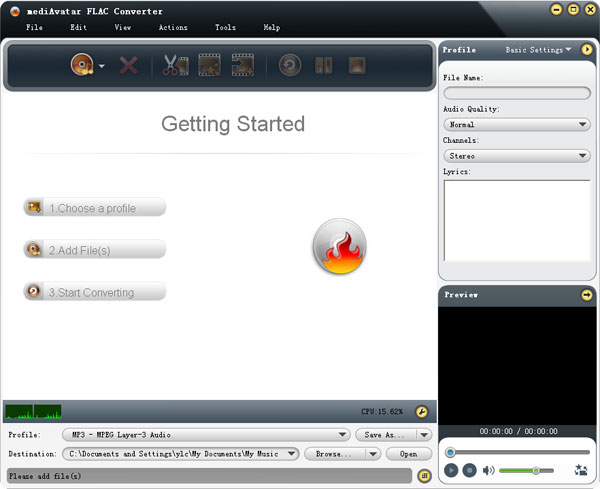
Ok, let's start now.
Step 1: Add Files to this FLAC Converter
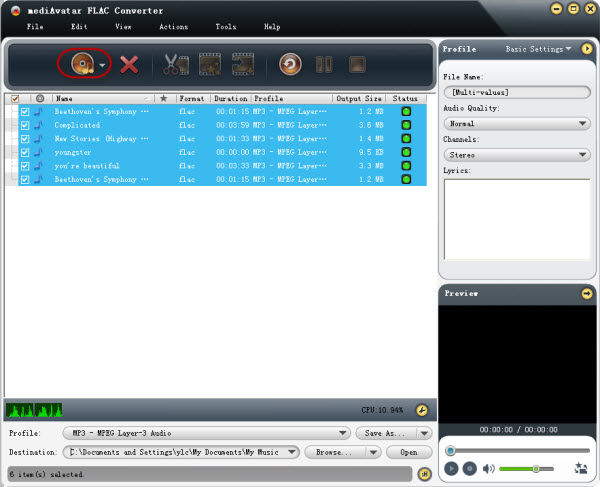
Drag and drop FLAC files you want to convert into the window of the software, or click on "Add File(s)" button on the toolbar or choose "File > Add Folder..." menu option to load the files.
Step 2: Set the Output Format and Destination Folder
Choose the "file(s)", click and open "Profile" drop-down list, then choose the output format you want. You can set the output for all files with the same output formats, or set separately with different formats.
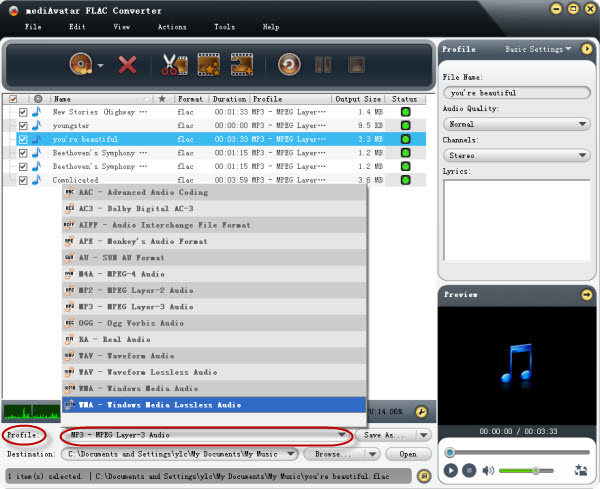
While, if you would like to convert one FLAC file to more than one formats, like you want to convert the file to both MP3 and WMA, you can click "add profile" button on the toolbar, and choose the second profile simply.
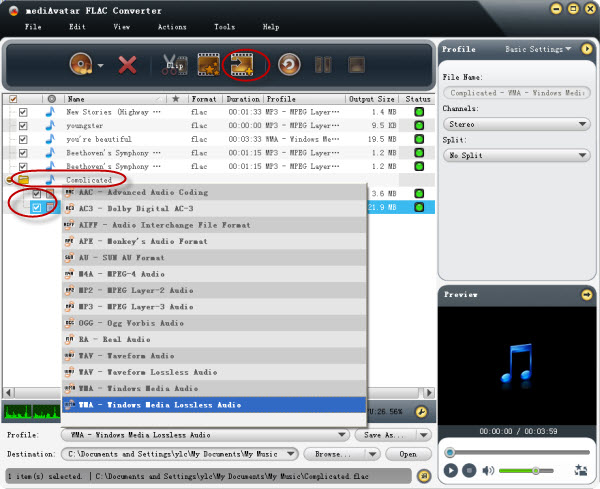
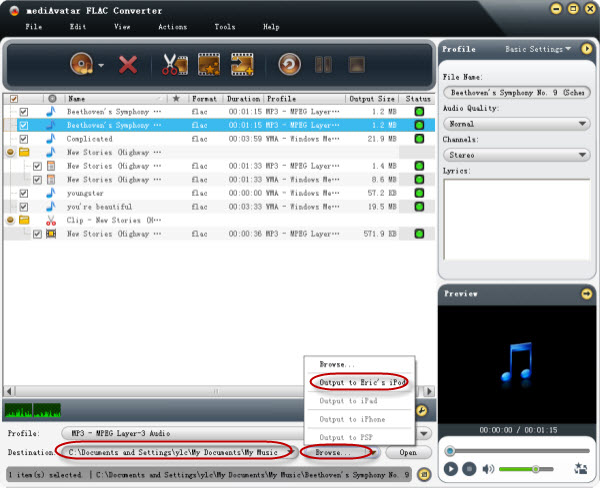
Then click "Browse" button beside to choose an output folder as the destination for saving the outputted audio files. Besides save the output files to computer, mediAvatar FLAC Converter also allows you to save and transfer the file to iPod, iPad, iPhone or PSP when the device(s) is(are) connected with the computer.
Step 3: Customize the optimize the output audio (optional)
Clip segments from video/audio to output
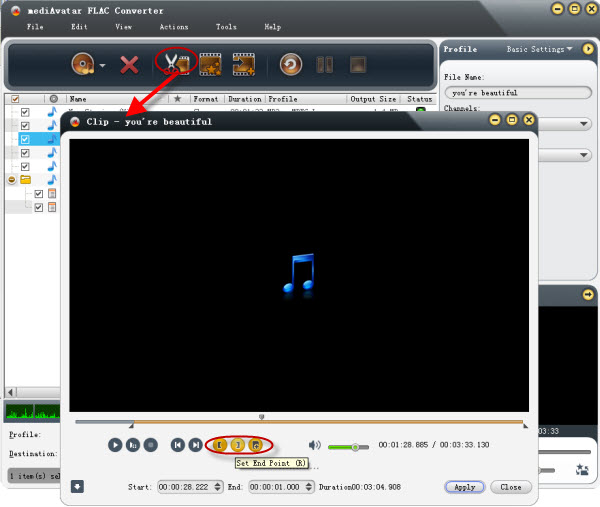
This is useful when you pick out a segment from a song or you make a ringtone from songs. Choose the source file, and click the "clip" button to open the clip window. Click "Set Start Point" and "Set End Point" icons during playback to set the start and end points of the segment. Repeat this step to add as many segments as you want.
Adjust sound effects for output audio
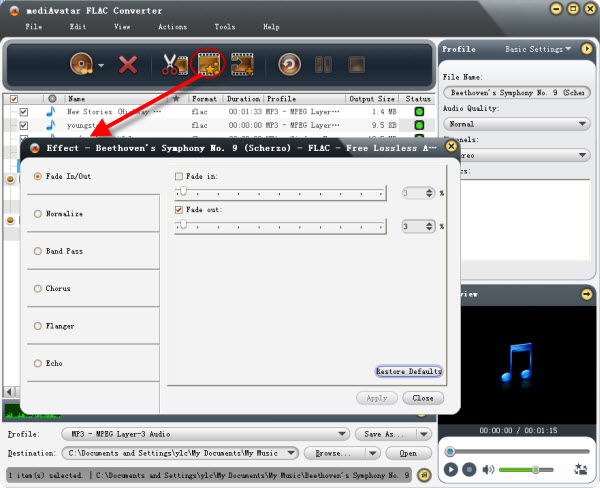
Choose the file you want to adjust effects from the file list, and click "Effects" button at the toolbar to open "Effects" window. Here you can set the "Fade In/Out", "Normalize", "Band Pass", "Chorus", "Flanger" and "Echo" sound effects for the output audios.
Optimize the audio parameters
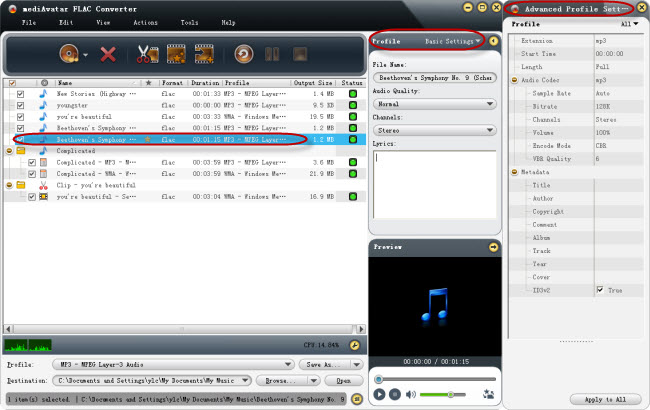
This audio converter provide ready to use formats for naive users, at the same time advanced user has the option to adjust the parameters in the basic/advanced settings panel.
Step 3: Start the FLAC to audio conversion
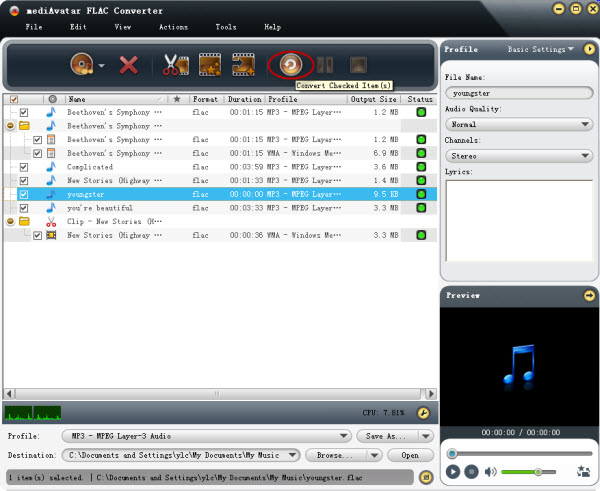
After all settings above just click "Convert Checked Item(s)" button on the toolbar to start the conversion.
