How to convert video to audio, MP4 to MP3?
- A through guide about mediAvatar Video to Audio Converter
Designed to extract soundtracks from movies or music videos, mediAvatar Video to Audio Converter supports decoding almost all video formats including high-definition and standard-definition videos then converting soundtracks to audio formats, e.g. convert MP4 to MP3. It has never been easier to convert video to audio with this video to audio converter: load video files, select the output audio format, and hit "Convert"!
And of course, there're still some customization options available for you to adjust the effect of the outputted audio files. And we would like to show you how to convert video to audio step by step.
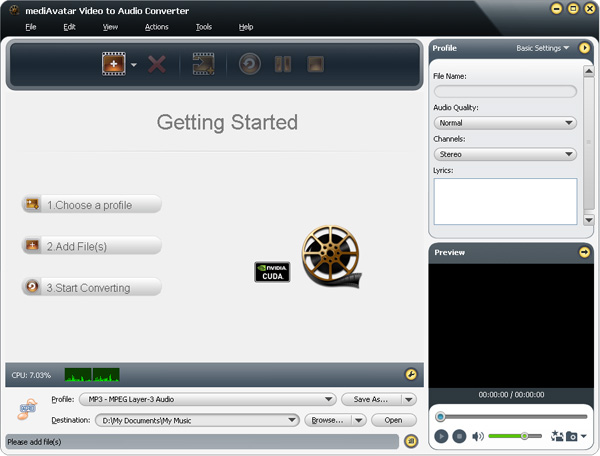
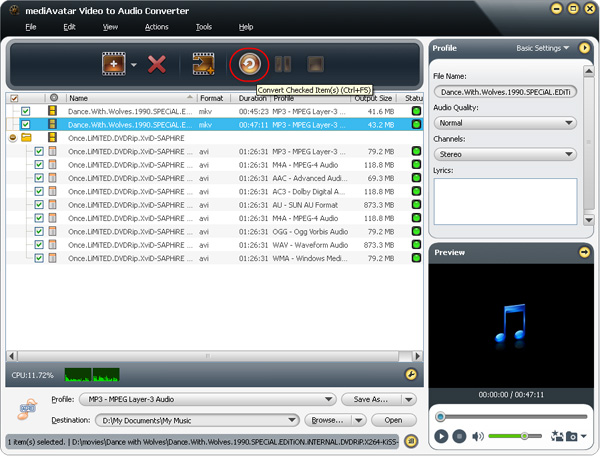
First download, install and launch mediAvatar Video to Audio Converter. You will see how this video to audio converter looks like:
Step 1: Load Video Files
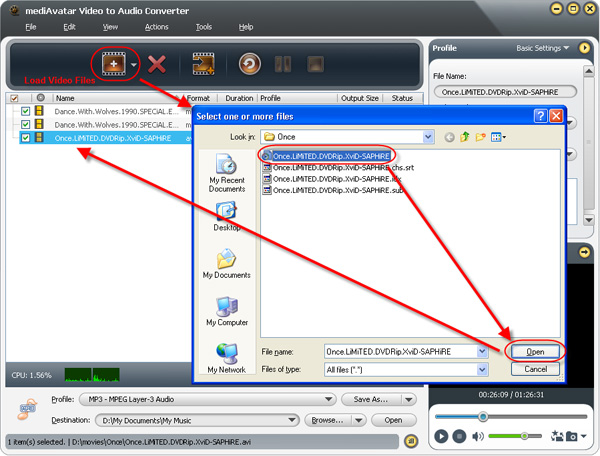
Drag and drop video files directly into the file list of this video to audio converter, or click on "Add File(s)" button on the toolbar or choose "File > Add File(s)..." menu option to load the video files you want to convert.
Or choose "File > Add Folder" menu option to choose a folder and load all the supported video files in this folder into this converter.
Step 2: Choose Output Format and Destination
Click "Browse" button beside "Destination" to choose an output folder for saving the converted audio files.

Click to open "Profile" drop-down list to choose the output format you want for the checked files. For example, if you want to convert MP4 to MP3, then choose "MP3 - MPEG Layer-3 Audio" as the output format.
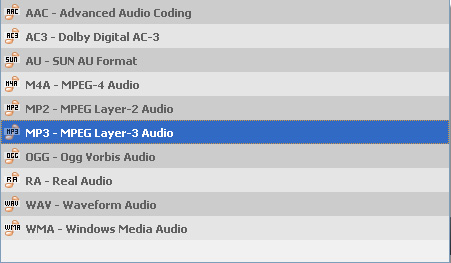
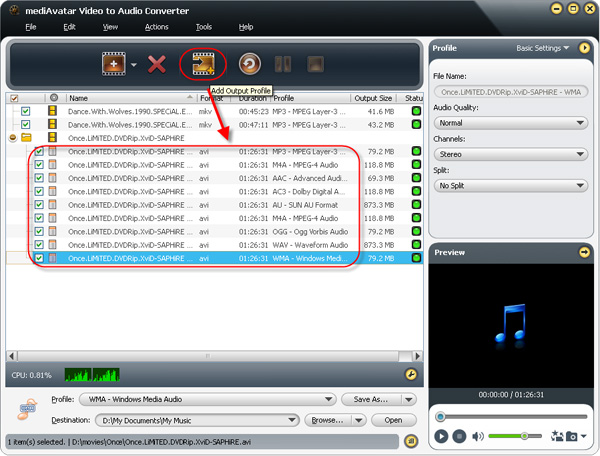
If you want to output many different format file fromt the same video for listening on different media players, then adding more than one profile to a single file would be the easiest and fastest way.
To do this, choose the video you want to convert, then click "Add Output Profile" button to add a profile then choose another output format from the "Profile" drop-down list. Repeat the above step to add as much output profiles as you want.
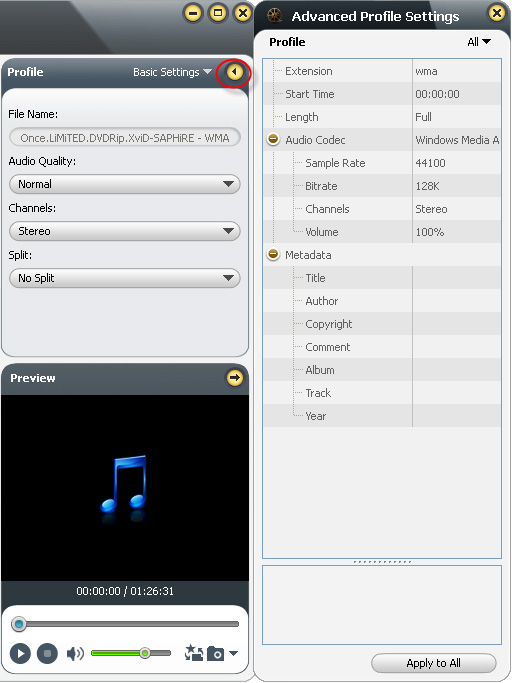
Generally, the output profiles we provide are all optimized with the best quality, however, there're someone who wants to change the settings. If it is, you may go to the "Advanced Profile Settings" window by clicking the arrow at the right top, from which you can adjust all the settings freely.
To help facilitating away-from-keyboard conversions, this video to audio onverter has the ability to automatically shutdown, stand by, or hibernate the computer or close itself after conversions are finished. To make use of these options, look under the "Actions > Post Task Actions" drop-down menu.
And you can check the CPU usage below the file list, and change the CPU core usage by clicking "Tools > Preferences" menu option to enter "Preferences > Convert" tab.
Step 3: Convert video to audio
All settings ready? Just click "Convert Checked Item(s)" button on the toolbar to start converting video to audio promptly! Okay, that's all!
Want to explore more? Go to this mediAvatar Video to Audio Converter to get a free demo and start converting video to audio now.


