How to rip and convert DVD to AVI MP4 MP3 for iPod iPad PSP on Mac?
- A guide about mediAvatar DVD Converter Pro Mac
This article will guide you step by step to rip even protected DVDs and edit the output videos. mediAvatar DVD Converter Pro Mac can help you rip any DVD to popular video and audio formats for playing on Mac or portable digital players like iPad, iPod, PSP, and so on.
Supported Video formats: AVI, MPEG, WMV, MP4, FLV, H.264/MPEG-4 AVC, DivX, XviD, MOV, RM, ASF, MPEG-1, MPEG-2, MPEG-4, Super Video CD Format, Video CD Format, VOB MPEG2 PS Format
Support Audio formats: MP3, WMA, AAC, WAV, OGG, RA, M4A, AC3, MP2, AMR, SUN AU
Support Devices: iPad, iPod, iPhone, Apple TV, Zune, PSP, PS3, Cell Phone, Creative Zen, iRiver, PMP, Archos, Sony, MP4 player and MP3 player
How to rip DVDs to AVI MP4 MP3 for iPod iPad PSP on Mac
Step 1: Load the DVD disc you want to rip
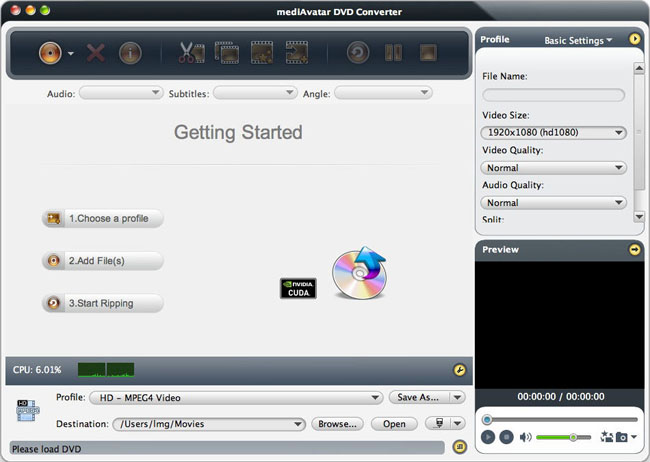
Insert the DVD movie disc you want to rip, then click on "Add File(s)" button on the toolbar to load the DVD disc.
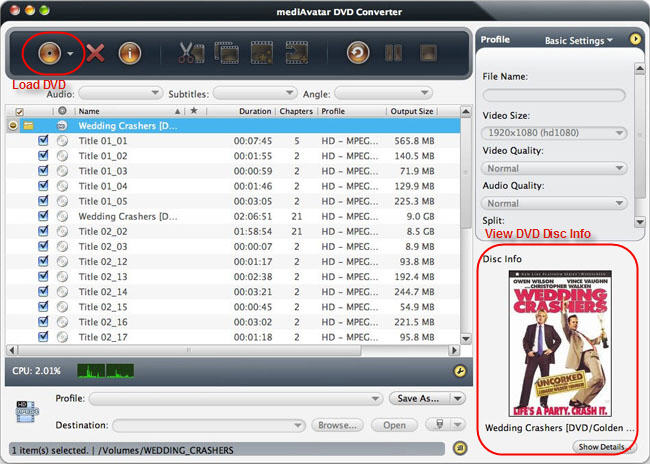
This DVD converter for Mac would read the DVD disc and show the content out. Then you can view the disc info by clicking the "show details" info.
Step 2: Set the output format
Check one or multiple titles, click and open "Profile" drop-down list as picture below shows, you will see the conversion profiles are sorted by common use, devices and user-defined. Choose the output profile you want. And if you would like to convert the DVD to more formats, click "Add Output Profile" button on the toolbar, then choose different output format for the new item, repeat this step to add as much output formats as you want.
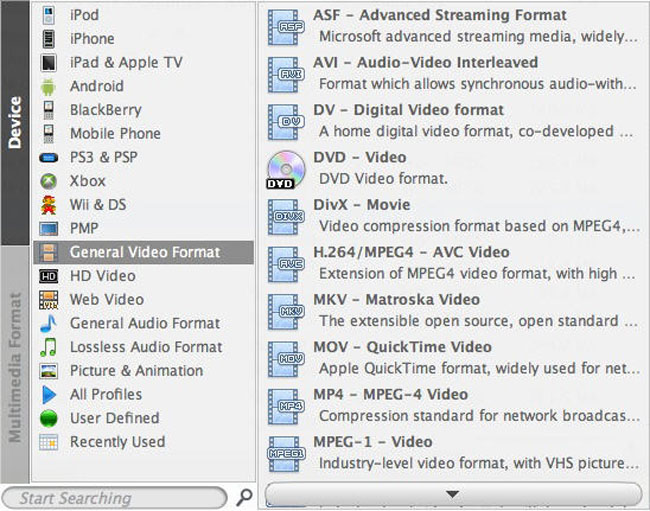
What's more, if you want to output the target files to iPod after converting, please connect your iPod to Mac and click the drop-down arrow and choose the "output to iPod" option in the list. mediAvatar Video Converter Pro Mac will transfer the files to your iPod after your conversion. This also works with iPhone, iPad, PSP, and iTunes.
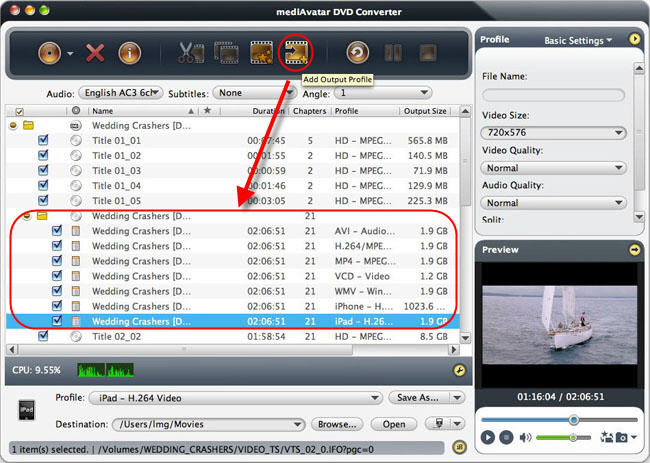
mediAvatar provides optimized profiles for different formats and they are ready to use on the devices. And also for professional users, it allows to change the video and audio parameters - Choose "Basic Settings", "Video Codec", "Audio Codec", or "Metadata" option to adjust their respective parameter settings. Or click the right arrow to expand the "Advanced Profile Settings" window, from which you can set all the parameters freely as below.
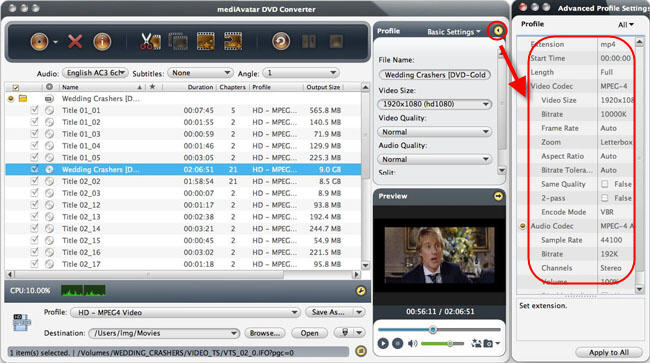
Besides the settings above, you can also edit the output videos before start converting. And if you don't want to do other editing, you can go to step 3 directly.
Step 3: Start the conversion
When the settings above are ok, click "Convert" button to start the video converting.
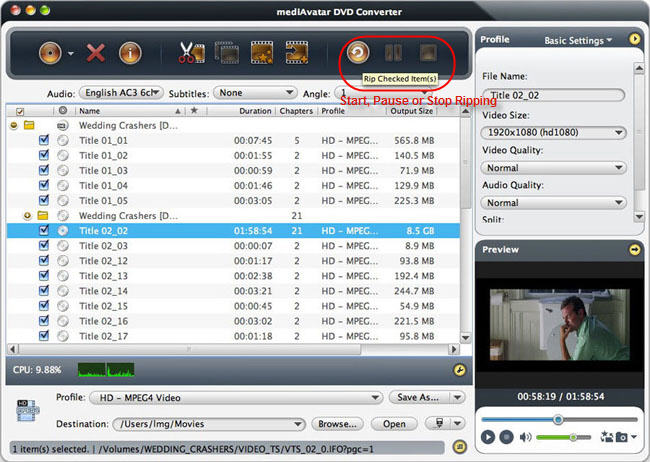
And when the conversion finished, you can click the "Open" button to check the target files directly.
Edit the output videos before DVD ripping
- Clip video segments
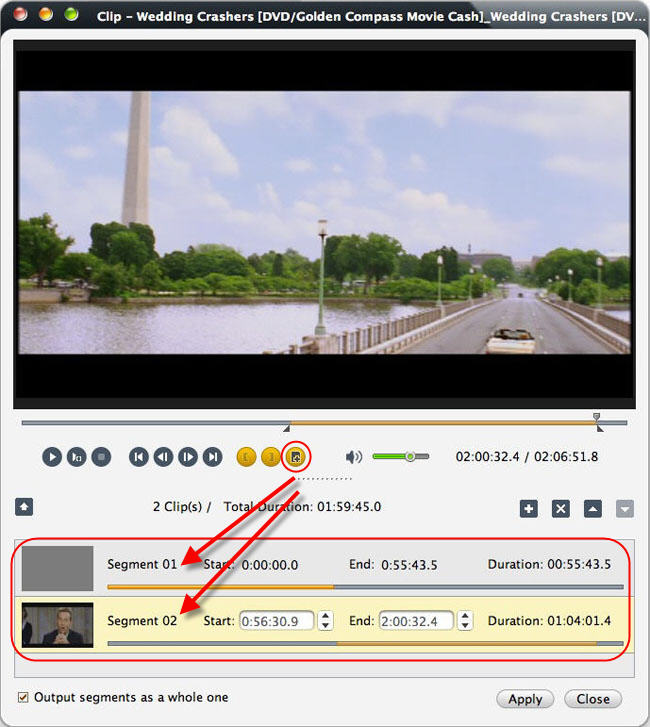
Choose the DVD title you want to clip from the file list, click "Clip" button on the toolbar to enter "Clip" window.
Click "New Clip" button to add a new segment into the segment list, then set its start time and end time by entering the values in the boxes or dragging the sliders in the player. Repeat this step to extract as many segments as you want.
Click "Move Up" or "Move Down" button to adjust the order of these segments.
If you check "Output segments as a whole one" option, then all the segments in the list will be merged into a single file after you click "Apply" and "Close" buttons to return to the main window.
You can freely choose different output formats for every segments.
- Merge segments
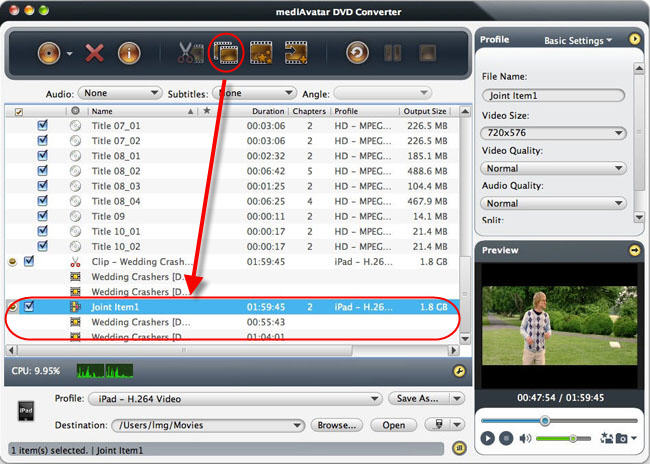
Select the titles or clips you want to merge in the file list, and click "Merge" button on the toolbar to merge these into a single file.
- Add Transitions for joint videos
Double click the joint item or select the joint item then click "Edit Joint Item" on the toolbar, the "Joint Item" window appears. Check "Enable Transitions" option, select the transitional effect you want from the transition list for each transition.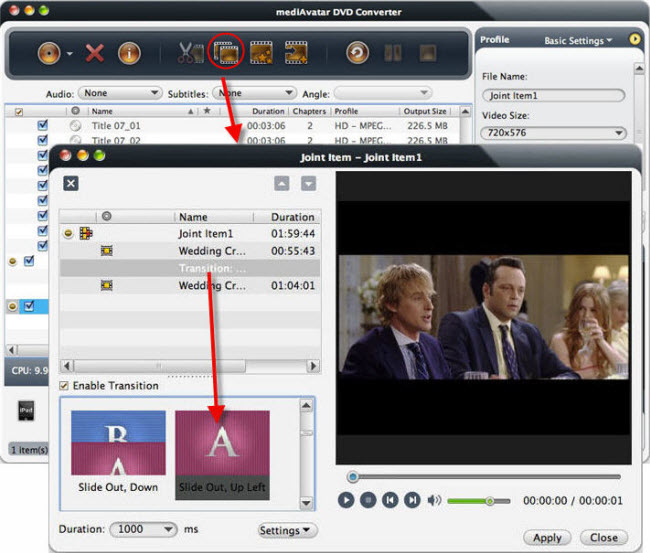
- Crop, Watermarks, Soundtracks, Subtitles, Image Effects
Besides these, this DVD converter allows you to crop video screen size, add subtitles/soundtracks/effects/watermarks to the outputted movies. To do this, choose an item from the files list, and click "Effects" button on the toolbar to enter "Effect" window as below. Switch the tabs to enter the different effects panel.
- Crop the video image
Choose the video and click "Effects" button on the toolbar to enter "Effect" window. And the "Crop" option is already checked by default.
Use the right mouse button to drag over the area that you want to retain on the image.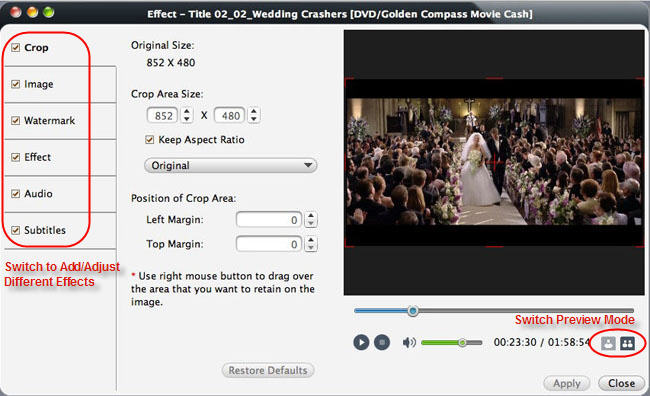
- Adjust image brightness, contrast and saturation
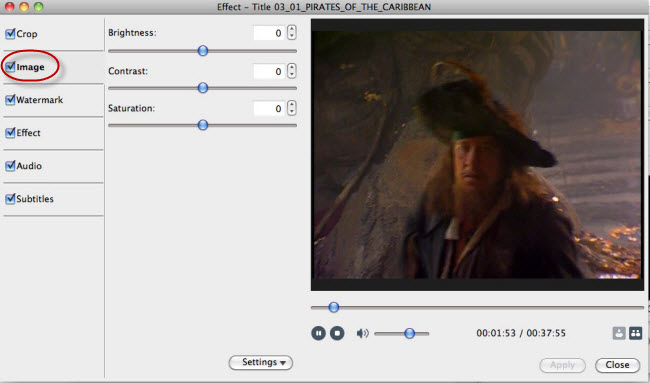
Click "Effects" button on the toolbar to enter "Effect" window. In "Image" tab, you can adjust the brightness, contrast and saturation of the video image by dragging the sliders.
- Add Text or Picture watermarks to the video
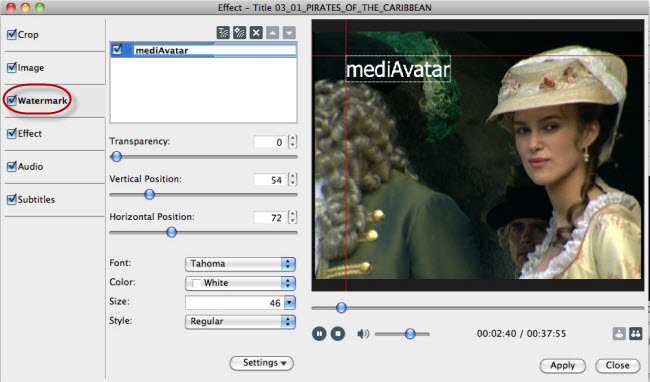
Open the "Watermark" tab, and in this table you can add text and picture watermarks to the video and adjust the watermark transparency and position.
- Add and Adjust Image Effects
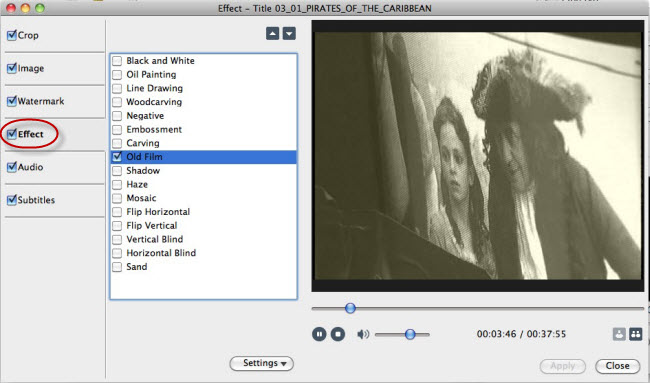
Click to open the "Effect" tab. Check the effect(s) from 16 effect options to apply on the video.
- Add audio soundtracks to the video
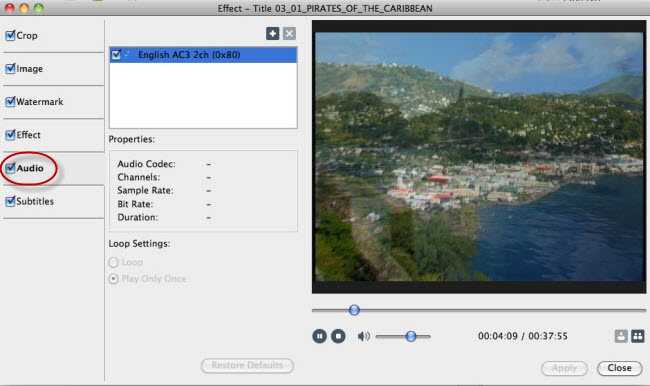
Click and open "Audio" Tab. Click "Add Audio Track" button above the audio track list, and load the audio track you want to add as background music.
And after all these effect settings are done, you can click "Comparing Preview" button at the right bottom to abreast preview the original and fixed image effect.
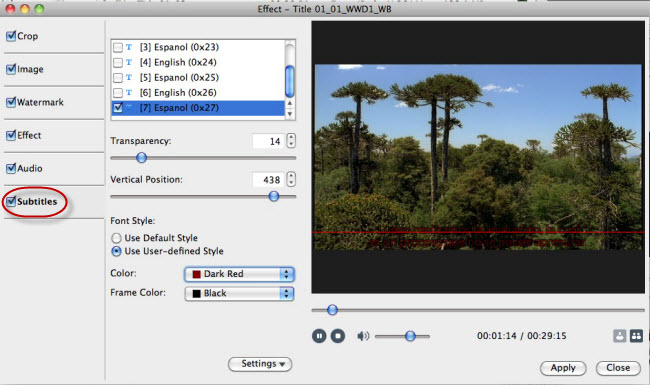
- Adjust DVD subtitle
Click and open "Subtitle" Tab. Choose the subtitle file from the list, then adjust its parameters including Transparency, Vertical Position, Font, Color.
